
The weather this past week was so beautiful I just couldn’t bring myself to do my indoor chores. Rather I focused on readying my flower and vegetable gardens and started an herb garden.
Here are a couple of photos. More to follow.

The weather this past week was so beautiful I just couldn’t bring myself to do my indoor chores. Rather I focused on readying my flower and vegetable gardens and started an herb garden.
Here are a couple of photos. More to follow.

It was so beautiful this past weekend I just couldn’t do any of the indoor chores on my list. Instead I began to prepare my vegetable garden which includes, raking leaves, adding fresh compost to my raised beds and planting some vegetables.
While preparing the earth I came across the Jerusalem Artichoke tuber…
...I digress... Last spring I planted one small Jerusalem Artichoke tuber I had purchased from a local grocery store. It created this lovely plant which looks similar to a sunflower (often Jerusalem Artichokes are called SunChokes because of the plant’s similarity to a sunflower).
I used my pitchfork to gently uncover the tubers and look what I ended up harvesting!!!
A true bounty.
 If you find one of these in your local store, I suggesting giving the Jerusalem Artichoke a chance.
Sautéd Jerusalem Artichokes with Garlic and Bay Leaves

Jerusalem artichokes are sweet and almost garlicky and mushroomy and gorgeous. Although called artichokes they’re actually tubers – like rough and ready potatoes. You can scrub and roast them whole like mini jacket potatoes and split them open, drizzled with a little chili oil. You can even use them in a salad with smoky bacon. A Jerusalem artichoke’s best friends are sage, thyme, butter, bacon, bay, cream, bread crumbs, cheese and anything smoked.
To serve 4, you will need 600g/1lb 6oz of Jerusalem artichokes. Peel them, then cut them into chunks. Place them in an oiled frying pan and fry on a medium heat until golden on both sides, then add a few bay leaves, 2 cloves of garlic, finely sliced, a splash of white wine vinegar, some salt and pepper, and place a lid on top. After about 20 to 25 minutes they will have softened up nicely and you can remove the lid and the bay leaves. Continue cooking for a couple of minutes to crisp the artichoke slices up one last time, then serve straight away. Personally, I think they go well with both meat and fish and are particularly good in a plate of antipasti, or in soups or warm salads.
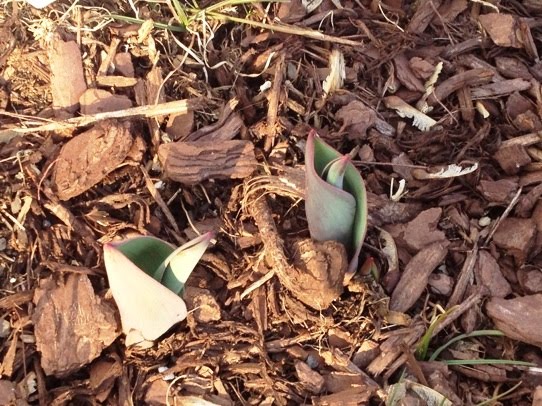
 Crocus pop up where every they want to.
 Moss and the last of melting icicles
 The sun and warmth end a very easy winter.
 I love spring, especially after a mild winter. The hidden or forgotten treasures never cease to amaze.
 I seem to have caught a case of the Carpentry bug!
This past weekend I built a bench. Building things from wood is a lot of fun and definitely something you get better at each time you complete a project.
I have been looking for a storage bench for quite a while but could not find one that was right for the space (either too big, or too small, or too expensive). So, I took the logical step and made one to my specifications.
Unfortunately, I do not [yet] have much in the way of equipment… A skill saw, rather than a table saw, a cordless drill with only a few bits - many have broken or are missing…

But I can still make a pretty decent storage bench which completes my foyer nicely. And now there’s the perfect place to take off and store your shoes and coats.
My next project: Finish the dining room.
Goal: By May 1, 2012.
To Do: Patch ceiling and walls, add chair rail, paint, hang chandelier, build a built-in shelf.
Here are some photos of my dining room ceiling and walls as they are today.

My electrician has installed a new outlet and it's ready for the plaster work before installing the light fixture.


When I purchased the home there was a small, very awkward closet in the kitchen area. It didn’t take long for me to decide that it shouldn’t be a closet but should be a pantry.
First came the demolition: removing the “faux” wood paneling (which is ALL OVER THE HOUSE), the oversize and unusable wooden sliding wood doors (which I’ll use for a later project) and the few “press-board” shelves which were put up on ugly metal frames.
It wasn’t easy but it was quite satisfying.

Then I came upon a page in a home magazine of this shelf and realized, no ordinary pantry would do!
So, I built one of my own. I couldn’t find the spindles (“railing”) that I needed at any of the big box hardware stores so I improvised and bought various lengths of wooden table legs.
Here is the finished project.
My biggest concern was of course, weight – I didn’t want to worry about anything on the shelves come crashing down. So, I started with a simple 2 x 4 frame
For the shelves, I used a high-grade piece of plywood, cut down into 16 inch by 48 inch pieces. On the back of the 2 x 4 frame I attached a piece of bead-board.
I attached the back of two of the shelves with wood screws (don’t forget to pre-drill – it really makes your life so much easier) to the 2 x 4’s and attached the back of the two middle shelves to 1 x 1’s. For the front, I drilled and used wood dowels to secure the legs to the shelves. Some of the legs had to be cut to fit.
Because the area is a bit dark, I decided to brighten it up a bit with gold/yellow paint.
The absolutely best part is that the shelves are at the perfect height. The microwave fits like a glove (no longer taking up valuable counter space) and the shelves are high enough in some areas to store tall items like cereal boxes and pasta canisters.
You can sort of see from this photo that on the right side, I've left enough room for a small wine refrigerator. On the left side, there is another shelf designed for larger items like those huge packages of toilet paper and paper towels and pet supplies.


